We have a great suggestion that came in from a viewer off our YouTube Channel. Tim asks, “Hey, can you give some advice on how to optimize your images?”
Full Video Transcript
Hey ya’ll, welcome to another WordPress Wednesday. My name is Kori Ashton, here in San Antonio, Texas. And we have a great suggestion that came in from one of our viewers off our YouTube Channel. Tim asks, “Hey, can you give some advice on how to optimize your images?” So, eh, Tim from Canada, here you go.
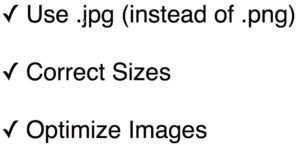
I’m going to give you some really cool advice on how to optimize your images. So if you’ve ever gone over to, let’s say, like, a tool like GTmetrix, and put in your domain name, and been given a report that has this right here that says “Optimize Images”, and unfortunately we didn’t even score at all. It’s worse than an F. We definitely need to optimize all of our images, and it’s suggesting that we compress them. So how do we do that? Well, the first thing I want to tell you is three different options for improving your images on your website. So these are the three different things. The first thing I want to tell you is please always try to use the extension .jpg. J-P-G. Try to use that instead of P-N-G. The reason why is these files typically tend to be significantly smaller in size.
So the only time you really ever need to use a .png file is if you need an image to not have a background color on it. Maybe like your logo, or something like that, and you’ve optimized it inside of a photo editing tool, and you’ve been able to save it as a .png file. Other than that, everything on your website should be saved .jpg.
And of course, you also want to have the correct sizes. So your theme should have very specific sizes that you should be using on each area of your website. Please be sure to use a photo editing tool to re-size those images correctly. What you don’t want to do is cram a 3000 pixel image into a space that only needs to be 300 pixels wide. So you really want to be sure you have the correct sizes in place.
And then lastly, even with those correct sizes, you want to always optimize your images so that they are completely compressed down perfect for web and easily loading on your website, and allowing your website just to load quickly for every user that visits no matter where they are.

So, let’s take a look at some options. I want to show you an example of a free plugin. They do have a paid versions of this, a pro version, but the free plugin works perfectly, allows you to totally compress all of your images on your website. So, I want you to be sure that if you’re viewing this video later in the future that all of these options are still here, that it’s been tested with WordPress core, compatible with what version you’re using, and that is has really great reviews like it does today. This is the plugin I’m going to suggest you use. So you’re going to jump into your plugins area and you’ll click “Add New”. And you’re just going to do a quick search for “smush“. And it should be the first one that pops up right there. Click install. Click activate. And jump into your media library and compress those down. This allows you to do about 50 images at a time, so ultimately you can do your whole library. It’s such a cool tool, and it’ll instantly help improve your load time.
I’m going to give you a couple of other examples of things that you can do. I’ve got a whole playlist here that I’ll put the link in the description box below for how to improve optimization on your site so that it loads more quickly. And then I’ll also give you a really cool video on how to find images for either free, free is always in the budget, or also minimal expense.
Hey, I hope this helps ya’ll. I will see you next WordPress Wednesday. Thanks, Tim, for the question.
